Showing posts with label Desserts. Show all posts

Wednesday, 25 July 2018

Golden Syrup Dumplings

I just love a baked dessert in Winter. It ticks all the boxes doesn't it ?  Golden syrup dumplings are  warm and hearty,  full of flavour and very easy on the grocery budget.  I'm not sure where this recipe originates from but my Mum made this for the family when I was growing up.  She wrote this recipe out for me as a newly wed and it has become a Winter favourite in my home too.

SYRUP

1 1/2 cups of water
1/2 cup of sugar
1 tablespoon of butter
1 tablespoon of Golden Syrup

DUMPLINGS

1 cup of Self Raising flour
1 tablespoon of butter
1 egg
1/3 cup of milk

Add all the syrup ingredients to a medium saucepan and bring to a gentle boil.

While the syrup is heating, in a bowl rub the butter into the flour until it looks slightly crumbly.

Combine the milk and egg in a cup then add to the flour mixture.  Mix with a knife until just combined.

Turn the dough out onto a floured surface and knead slightly into a ball.

Portion 8 equal dumplings from the dough and gently place into the heated syrup.

Place the lid on the saucepan,  turn the heat down to a minimum and cook for 20 minutes.

DO NOT LIFT THE LID until the 20 minutes are up.

Serve with cream,  icecream,  milk or a combination of your choice.

Serves 4 - 8.

May be refrigerated for a couple of days and reheated in the microwave.


Wednesday, 11 April 2018

Creamed Rice

This recipe is an oldie but a goodie.  I grew up with this recipe served hot in Winter and cold in Summer as a wholesome dessert.

1 cup of white rice - uncooked
1 litre of full cream milk
3/4 cup of sugar ( or to taste )
Water to cook the rice.

In a medium / large saucepan add the uncooked rice and a kettleful of boiled water.

Cook for approximately 10 minutes until tender.

Drain the water from the rice and return the rice to the saucepan.

Add the milk and sugar to the rice and stir.

Slowly bring the mixture to boiling point,  stirring very regularly to prevent it sticking to the bottom of the saucepan.

Once the rice reaches boiling point,  turn the heat down until it reaches a  gentle simmer.  Stir every 5 minutes.

Cook until the rice absorbs most of the milk which could be about 30 - 40 minutes.

Serve hot or cold with fruit,  on it's own or with a little bit of brown sugar or cinnamon on top.


Thursday, 28 September 2017

Apple Sponge Dessert

This comforting dessert is a great way to use up a few wrinkly apples from the bottom of the fridge.  I prefer to use Granny Smith apples ( cooking apples ) for their tart flavour which is offset by the sugar and cinnamon.

2 - 3 Granny Smith apples
butter for greasing
2 teaspoons of sugar
cinnamon for dusting

! tablespoon of butter
1/4 cup of sugar
1 egg
1 cup of Self Raising flour
1/2 cup of milk  (approximately )

Peel, core and thinly slice the apples

Arrange the apples on the bottom of a greased pie dish.  The apples can be arranged up the sides a little but allow room at the top for the sponge batter.

Sprinkle the apples with cinnamon and 2 teaspoons of sugar.

In a bowl mix the melted butter,  1/4 cup of sugar,  egg,  flour and milk until it forms a smooth,  slightly runny batter.

Pour the batter over the apples making sure they are all covered.

Bake in the oven at 180 degrees Celsius for 30 - 40 minutes until golden on top.

Run a knife around the edges to loosen. Place a larger dinner plate on top of the pie dish and flip over so the dessert is now on the dinner plate.

Serve with cream or icecream ( or by itself ).

Serves 5 - 6.


The final product

Arranging the apples

Cinnamon and sugar added 

Adding thr sponge batter

Ready to flip

Ready to slice and eat.

Thursday, 13 April 2017

Bread Pudding In The Slow Cooker

    
 I found a similar recipe  to this in a slow cooker cookbook years ago.   I had to adapt it as the original recipe was American - which means LOTS OF SUGAR. I'm guesstimating the amount of milk I use as I never really measure it. I always seem to pour a bit more over the bread if it looks like it needs more.

I use the crusts from the end of a loaf of bread. I save them up in the freezer until I have 6 - 8 truly making it a cheap dessert.   You can use wholemeal, multigrain or white bread. I have also made the milk up using powdered milk. It works out just fine.

6 - 8 slices of bread
600 - 800 mls of milk
4 eggs
1/3 cup of brown sugar
Dash of vanilla essence
Good shake of nutmeg and cinnamon
Jam - any flavour
1/3 cup of chopped walnuts

Turn on slow cooker first - high if it's a slow,  slow cooker or low if it's a fast slow cooker  
Spray the slow cooker with canola oil
Very lightly spread the jam over the bread and cut into large squares - perhaps 6 per slice. Place evenly in the bottom of slow cooker with jam facing up.

In a bowl mix eggs, sugar, vanilla, milk, cinnamon and nutmeg. Pour over the bread in slow cooker dunking the bread under the mixture.  
Sprinkle the walnuts on top.

Cook for 3 hours and serve with cream or icecream.

Leftovers can be refrigerated for 2 days and heated up in the microwave as needed.

Bread pudding starting to cook.

Bread crusts with jam

Poured the egg mixture over the bread.

Dessert with cream.  Yum  !!!

Thursday, 9 March 2017

Scones

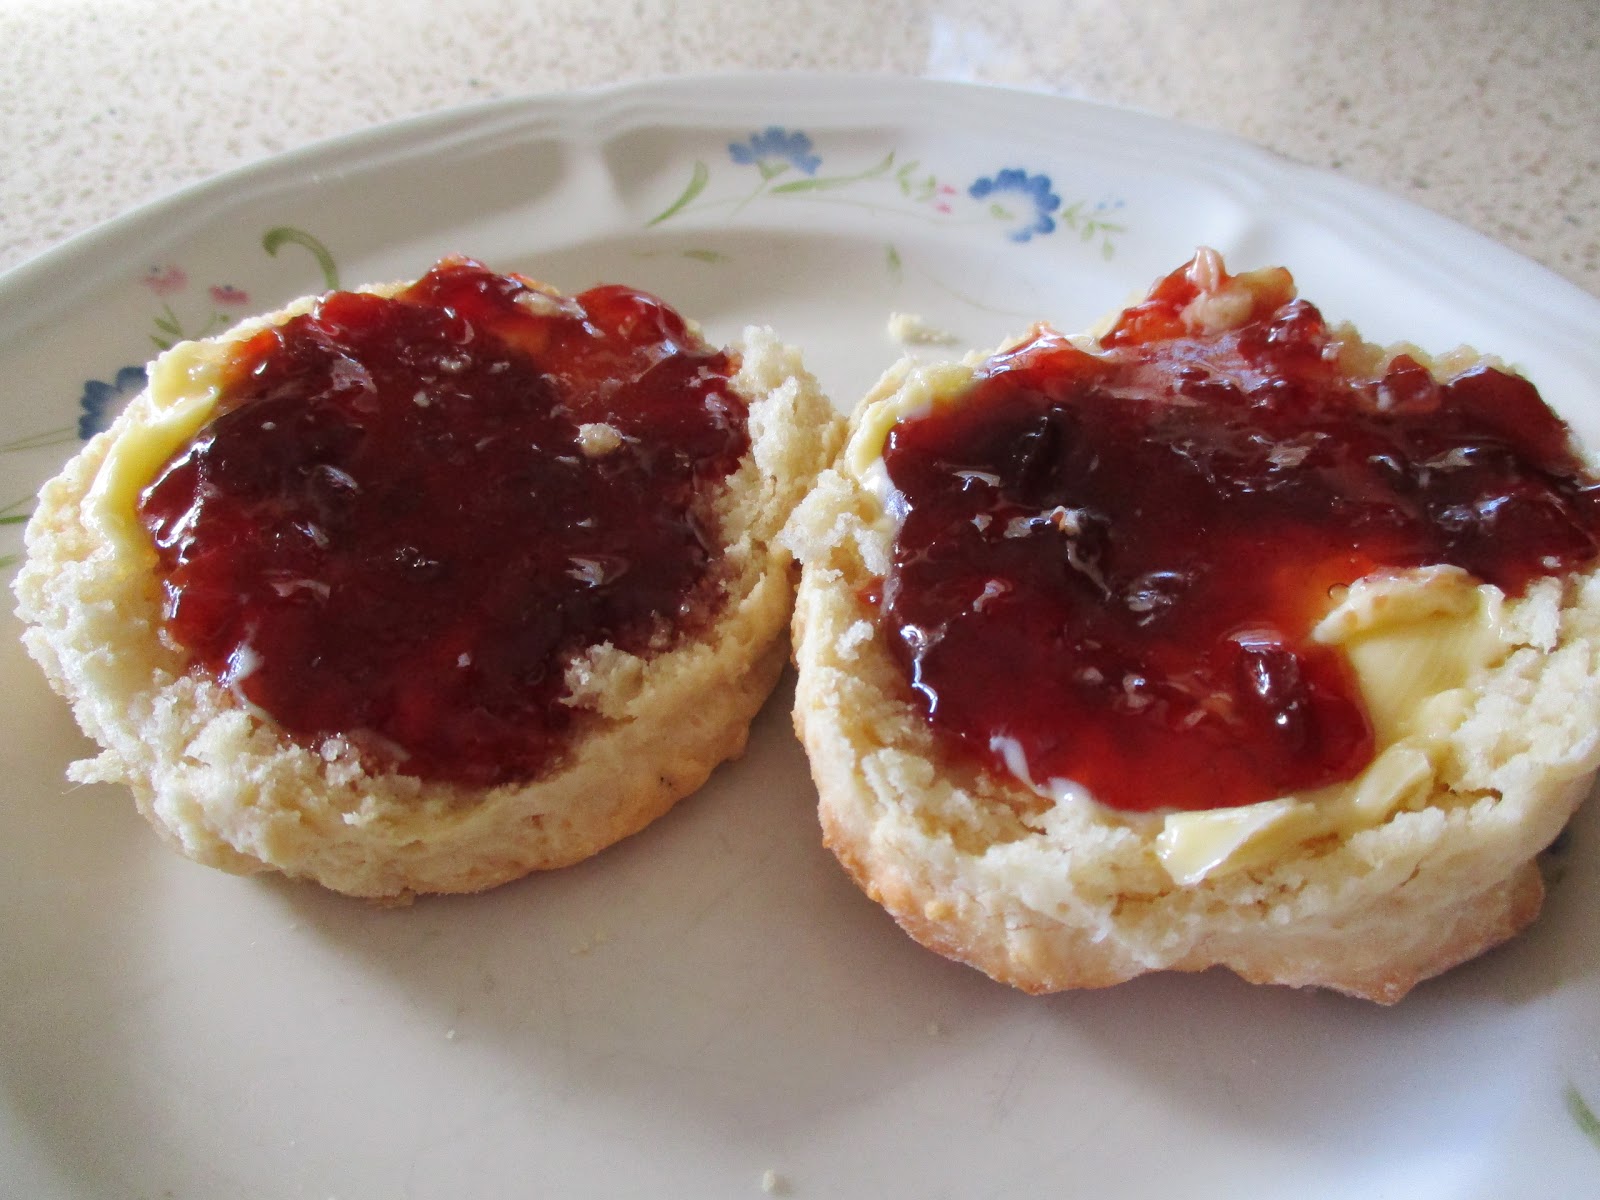
I just love a homemade scone.  Soft,  light and fluffy,  smothered in butter and homemade jam - mmmmmm.   Yes,  it has to be homemade jam for me.  I'm not one for cream on my scones but if it was offered  I'd eat it because I love scones.

I can't wrap my head around scone recipes that include lemonade.  Sorry but all that sugar and artificial rubbish included in soft drink has no place in the humble scone.  I'm all for eliminating artificial things from our diet,  not adding them for convenience.  I guess it helps that we don't have soft drink in our home except for special occasions ( and I don't drink it ).

There are recipes that include cream as an ingredient.  I generally don't have " spare " cream in the fridge just waiting to make scones.  The fat content is so much higher than milk and then you need to consider what you spread on your scones when eating.  Suddenly the humble scone should come with a health warning.  Ok,  maybe I'm going a bit over the top but I like traditional cooking and baking.

This recipe is for a basic scone with basic ingredients.


5 cups of self raising flour

2 tablespoons of icing sugar

75 grams of butter

1 3/4 cups of milk

3/4 cup of water


In a large bowl add the flour and icing sugar.  Combine well

Rub the butter in with your fingertips until well combined.  The mixture will have a slight crumbly texture.

Add the milk and almost all the water   Use a knife to combine the ingredients until it forms a dough.  Don't overwork the mixture.  If it looks a little dry then add small amounts of water until it becomes a sticky dough.

Lightly knead the dough on a floured surface and gently pat it out with the palm of your hand until it's approximately 3 cm thick.

Cut the dough with a floured round cookie / scone cutter in the size of your choice.  Cut as many as you can from the dough.

Very gently knead the dough scraps together and cut the rest of the scones out.

Place the scones side by side ( just touching ) in a greased lamington pan.  The pan should have sides approximately 5 cm high to allow the scones to rise straight up.

Brush the scones with a little extra milk.

Bake in a 220 degree Celsius oven for 15 - 20 minutes until golden on top.  They should sound hollow when you tap them with your fingertips.


Makes about 24 scones.  Can be frozen then warmed up in the microwave.

.


Monday, 5 December 2016

Egg Custard

Egg custard has been a family favourite in my family since I was a little girl.  Mum loved to make it when we were recovering from an illness.  Wind the clock forward a few decades and I've continued to make this delicious custard for Darren,  our girls and myself.  We don't wait until someone is sick though.  If we have too many eggs or milk that needs using in a hurry then egg custard is our dessert of choice.

2 eggs
600 mls of milk
2 tablespoons of sugar
2 tablespoons of cornflour

Extra 100mls of milk


Add the eggs,  milk and  sugar to a medium saucepan and whisk well to combine over a low / medium heat.

Using the extra milk in a cup,  add the cornflour and blend well until there are no lumps.  Add this mixture to the saucepan and whisk in well.

Continue whisking the ingredients and bring to a slow simmer.

Turn off the heat when the custard thickens.

NOTES -

*  Be careful that the heat isn't too high as the milk will catch on the bottom of the saucepan and burn.  That's why I like to whisk continually while it heats.

*  This recipe can be doubled if you need to use up more milk or eggs.

*  Great eaten hot or cold by itself or with fruit.


Monday, 27 July 2015

Cobbler Dessert

This is a wonderful Winter warming dessert.  I originally heard about this dessert on the Oprah show years ago when she popped into her neighbour's house unannounced.  They were having this dessert with their meal that night.  So I googled it and came up with my version of this American favourite. 

1 x 410 gram tin of fruit in juice or stewed fruit
1 cup of SR flour
1/3 of a cup of sugar ( white or raw )
About 1  1/2 cups of milk - enough to make it a slightly runny batter

optional extras - 
chopped walnuts
cinnamon and sugar to sprinkle on top,
sultanas or other dried fruit.

Lightly grease a medium casserole dish.

Empty slightly drained tin of fruit into a casserole dish, cutting up any large pieces.
In a mixing bowl mix the flour, sugar and milk until it's a smooth, slightly runny batter.

Pour evenly over fruit and sprinkle with nuts,  cinnamon and sugar.
Bake on 180 degree Celsius for 40 mins. Serve with cream,  ice cream or custard.


NOTES -

*  A couple of weeks ago I made a cobbler using stewed apple from the freezer.  It was a big hit with the family.  Darren said it tasted like apple pie.

*  Other fruit I've used with success are plums ( make sure you take the stone out ), peaches,  apricots and pears.

*  This dessert can be cooked 2 - 3 days ahead of time and reheated as needed.

*  If you don't have any tinned fruit,  grab a couple of apples ( even the wrinkly ones ),  peel,  cut and slice into a casserole dish.  Cover with cling wrap and cook in the microwave on high for about three minutes.  Then pour the batter over the top.


Monday, 13 July 2015

Fruit Crumble Topping Mix For Desserts

Jessica's favourite homemade dessert is apple crumble.  She could happily eat it at least once a week.  She's been known to eat leftovers for breakfast the next day.  When you think about it,  it does make a healthy breakfast too.  Having this bulk mix on hand in the pantry helps to get a quick dessert in the oven.


1 cup of plain flour
2 cups of rolled oats
1/3 cup of brown sugar ( MOO )
1 teaspoon of cinnamon ( approx ).

Mix all ingredients well and store in an air tight container.


To serve use 3/4 cup of mix and add two tablespoons of melted butter to a bowl.

Mix well and pour over cooked apple, or any tinned / stewed fruit and bake in the oven as per your recipe

This dry mix recipe can be doubled or tripled to suit the container size you'll store it in.


Monday, 29 June 2015

Apple Rose Pastries

I first saw a tutorial for Apple Rose Pastries on facebook a few weeks ago.  They are easy,  tasty and very impressive looking.  After looking at the tutorial a few times I thought I'd give it a go.  I've made a few changes as I came across some problems when making them.  Here's my version of a delightful dessert -


2 sheets of puff pastry
3 medium red apples
1 1/2 tablespoons of jam - any flavour,  store bought or homemade
1 cup of boiling water
flour for the bench
juice of half a lemon
cinnamon -optional
icing sugar - optional

Cut the apples in half and neatly cut out the core.
Thinly slice the apple halves discarding the small end pieces


Place and spread out the apple slices in a large microwavable bowl
Pour the boiling water over the apple and add the lemon juice.  Stir slightly.
Cover the bowl with cling wrap and punch a couple of holes in it.
Microwave on high for 3 minutes or until the apple is cooked and soft ( not mushy )
Drain the water and let the apple cool.


Defrost the pastry until it's almost room temperature. 
Lightly flour your kitchen bench and roll the pastry out with a rolling pin until it's longer by about 20%.  Make sure your rolling pin is lightly floured too.
Cut the pastry sheet into 5 long strips.


Warm the jam in the microwave until it's easy to spread
Spread the jam over the top half of each pastry strip


Layer the apple pieces over the jam. Make sure the apple overlaps each other.


Sprinkle with cinnamon and fold the bottom half of the pastry up towards the top.


Starting at one end,  roll the pastry up taking care that the apple doesn't fall out.
Pinch the pastry end to the rose.
Place each rose in a lightly greased muffin tin


Cook at 180 degrees Celsius for 40 minutes
Sprinkle with icing sugar and serve with cream or icecream

Makes 10 apple roses.


NOTES -

*  The original tutorial said to cut the pastry in 6 strips.  I found the pastry too firm to roll it out this thin.  I think the pastry in the tutorial was American and might be more flexible.

*  The apple slices must be cool or it will soften the pastry too much making it hard to work with

*  Make sure the jam is just warm or it will soften the pastry.

*  The original recipe used cold water to cook the apples.  This takes too long to heat up in the microwave

*  The apple roses can be made and cooked ahead of time.  I found them easy to reheat in the oven on a baking tray.

Tuesday, 2 December 2014

Making Your Own Yoghurt

About 4 1/2 years ago I met a lady at a bakery.  It was closing time and we were there to pick up the left over bread to give to needy people.  It was the first time I'd met this lady.as she was filling in for a friend.  We started talking about things we make from scratch.  I said I had a yoghurt maker and loved making yoghurt cheaper than store bought.  She told me about a website called The Cheapskates Club where you could find a recipe for making one litre of yoghurt for about $1.  As soon as I arrived home I just had to check out the website.  I've been a member ever since and the rest is history. 

I never saw that lady again but I'll be forever grateful for passing on such valuable information.

The recipe below is my adapted version of the Cheapskates one.  I hope you enjoy it.


2 tablespoons of natural yoghurt
1 1/2 cups of full cream powdered milk
dash of vanilla extract
4 tablespoons of sugar ( optional if you don't want it sweet )
tap water
boiled water

As you boil the kettle, put tap water into the Easiyo container up to the 500 ml mark ( the one you make the yoghurt in, not the thermos part )
Add milk powder, natural yoghurt, sugar and extract.
Blend with a hand blender
Top up the container to the 1 litre mark with tap water
Put lid on and hand shake
Fill Easiyo thermos to the top of the red insert with boiled water
Put the yoghurt container in and put thermos lid on
Leave on the bench for 10 - 12 hours
Take container out and put in fridge. 
NOTES -This yoghurt keeps for up to two weeks after it's made. 
 If you are making it unsweetened,  once it's set,  save two tablespoon of the yoghurt and freeze it to start another batch.  
 Flavour can be added by using jams,  toppings and pureed fruit once it's been made.
Full cream milk powder must be used for it to set.  Low fat milk powder doesn't have enough fat.  

The Easiyo system retails for about $20 and can be bought at Big W and Woolworths.  It makes a fantastic present for all occasions.


Tuesday, 18 November 2014

Chocolate Self Saucing Pudding


1 cup of Self Raising flour
75 grams of butter – melted
Approx. ½ cup of milk
1/3 cup of sugar
2 tablespoons of cocoa powder – sifted

 Sauce
½ cup of sugar
2 tablespoons of cocoa powder
Approx. 800mls of boiling water

 Mix flour,  sugar and cocoa powder together in a medium bowl.  Add the melted butter and milk and mix to form a very thick batter.  Spoon into a deep casserole dish and smooth off the top.
Into a large measuring jug add the cocoa powder,  sugar and boiling water.  Stir until sugar has melted.  Pour gently over the batter.

Bake in the oven at 180 degrees for about 40 minutes.  Serve with cream or ice cream
Just out of the oven

Ready to eat.
.